A checklist is a simple, yet powerful tool to manage your work and improve task completion quality.
There are a number of checklist tools and templates available today. However, sometimes you may need to create a really simple checklist. And signing up for an app or downloading it may seem like a lot of work.
In such situations, Microsoft Word can help.
It’s a powerful text editing software. And almost everyone can use it.
In this article, we’ll show you two ways to make a checklist in Word.
How to make a checklist in Word?
Use this method if you want to create a clickable checklist in MS Word.
The obvious advantage is that you can share a soft copy of the Word document with your team. As they run the checklist, they can check off each item on the list. This is particularly useful if your team is working from home.
The disadvantage of this method is that it works only with Microsoft Word 2010 and up.
It’s also not backward compatible. This means documents created in older versions of Word cannot be edited in Word 2010 to add checklists. However, in older versions of Word, you can create a printable checklist (learn how towards the end of this article).
Now that you know if this method works for you, let’s dive into the steps.
1. Enable the “Developer” ribbon tab
The Developer tab hosts the checkbox control that we need to create a clickable checklist. But, by default, this tab is not visible on the ribbon menu.
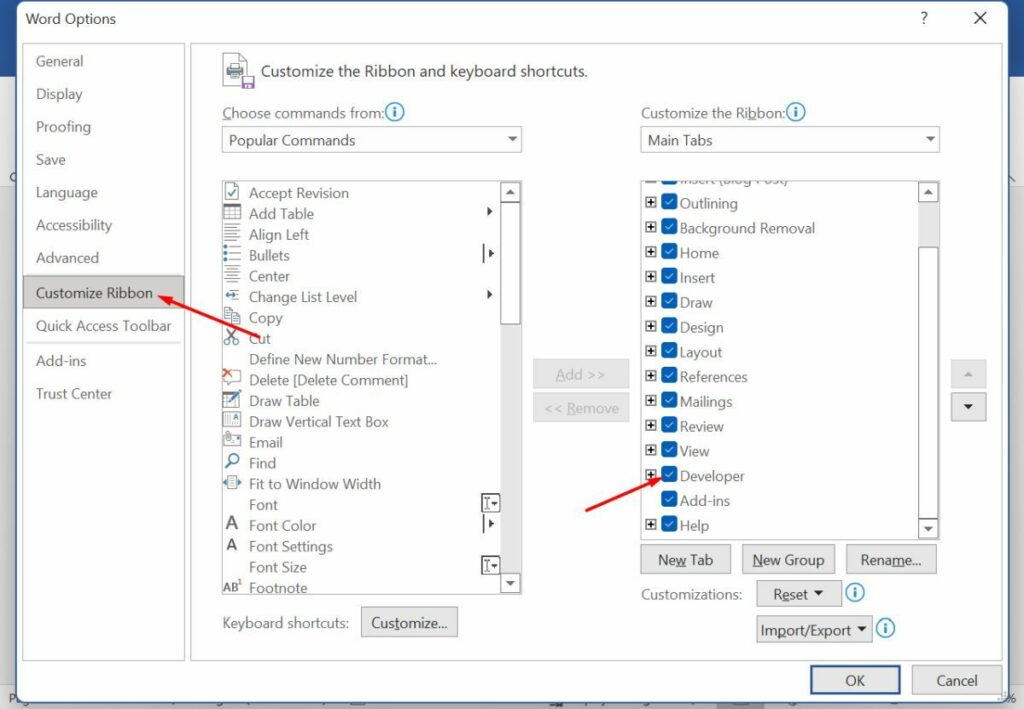
To enable the Developer tab:
- Open the Word Options dialog box by navigating to File → Options.
- Click on the Customize Ribbon option.
- Finally, check the Developer checkbox in the Main Tabs control.
With these steps, the Developer tab should now be visible in your Word document’s ribbon menu.
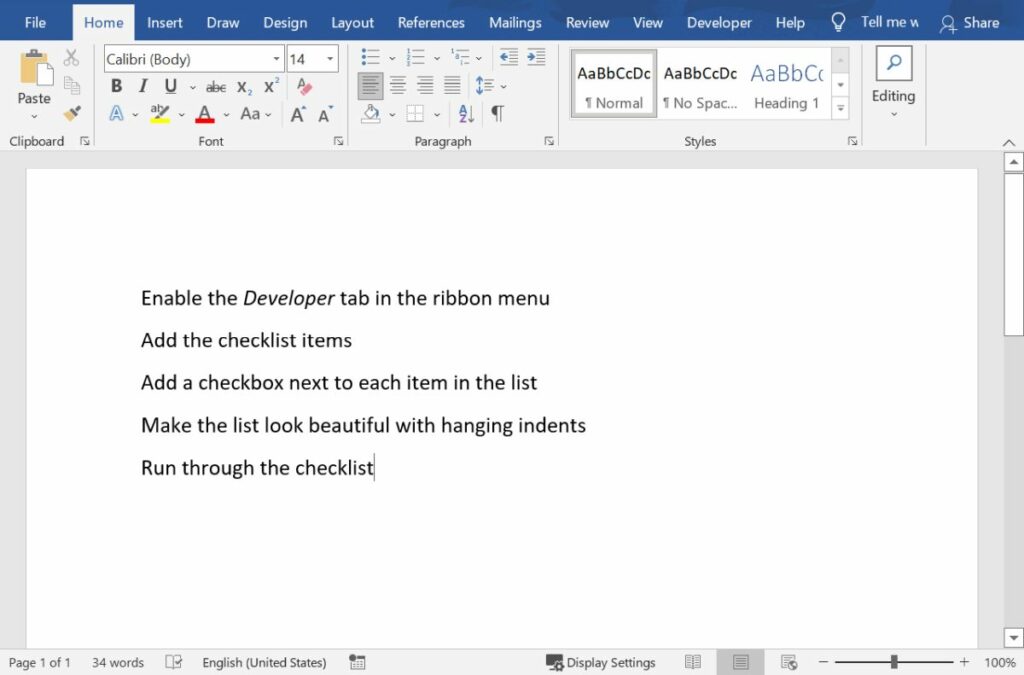
2. List down your checklist items
Next, type the list of items for your checklist in the Word document. You don’t need any special formatting for these items.
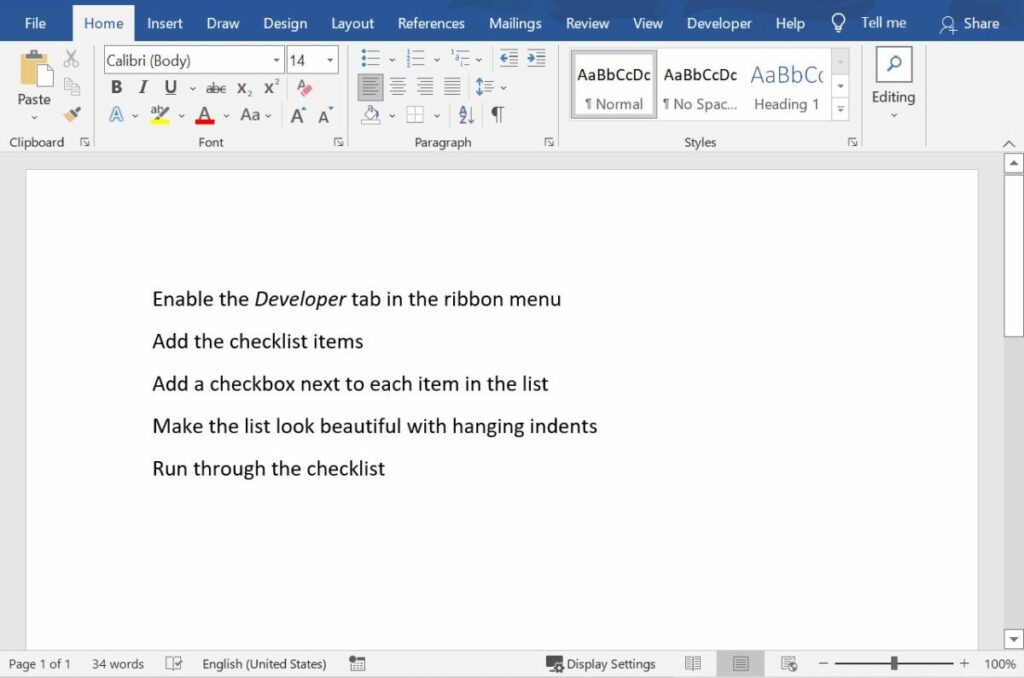
Items in this list can be as simple as your daily to-do list, your team’s task list, or even a process checklist.
3. Add a checkbox next to each item
Once your task list is ready, the next step is to add a checkbox next to each item.
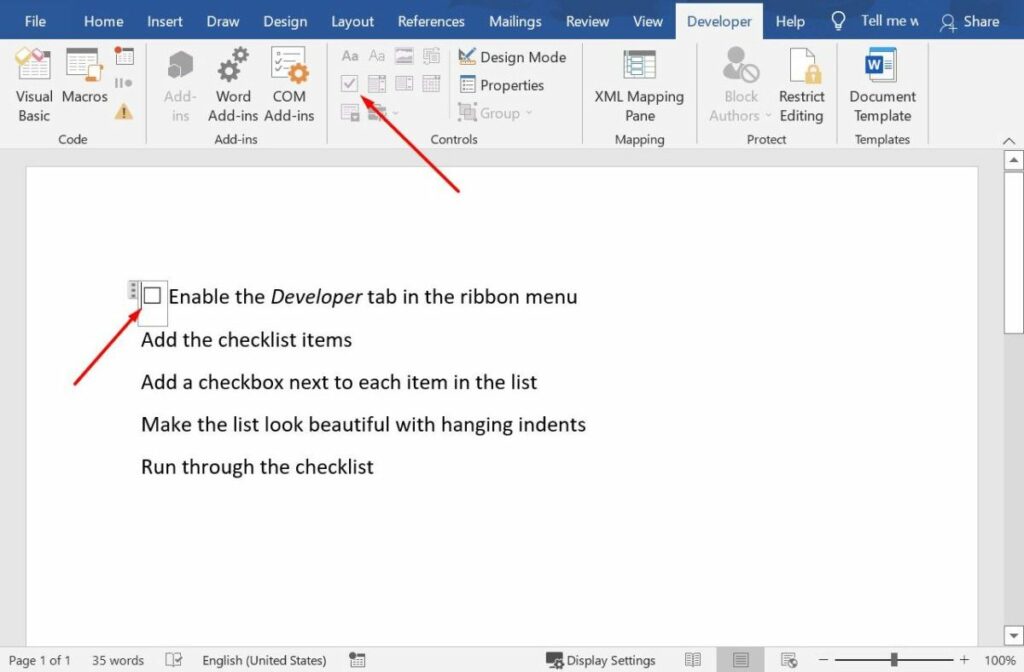
To add a checkbox:
- Place your cursor at the start of a checklist item.
- Navigate to the Developer tab in your ribbon menu.
- Click on the checkbox to place it.
- Repeat the above steps or simply copy-paste the checkbox control for each item in the list.
4. Make your checklist look pretty with hanging indents
Some list items may long enough to wrap onto the next line. This makes your list looks clumsy. You can easily fix it with hanging indents.
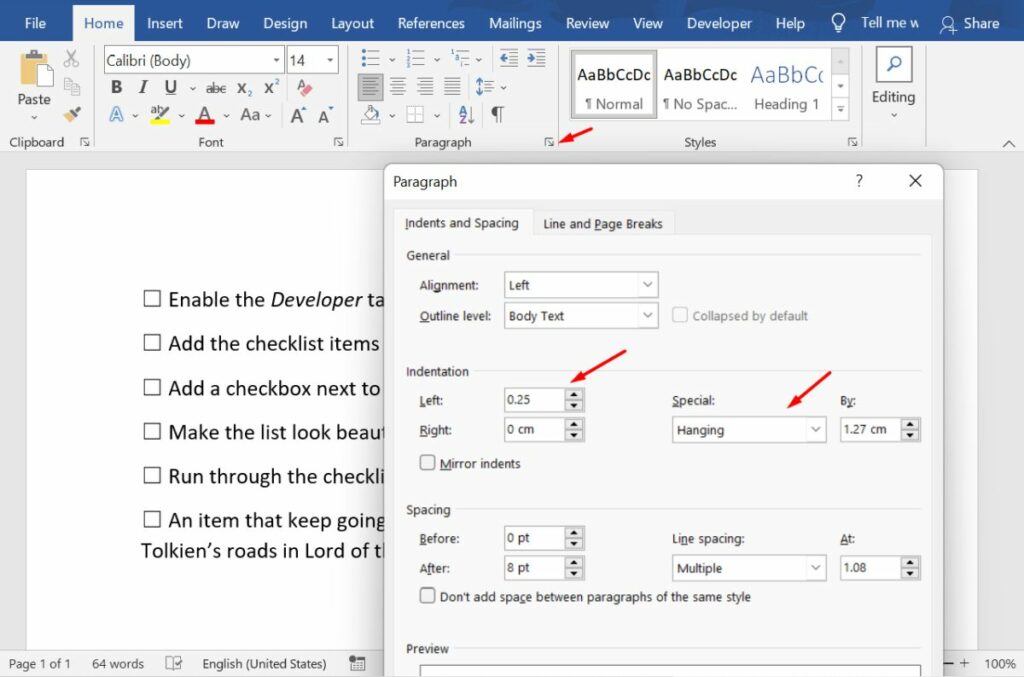
To set up hanging indents:
- Open the Paragraph Options dialog from the home menu by clicking on the tiny arrow in the bottom-right corner.
- Set the Indentation → Left property to 0.25 and the Indentation → Special property to Left.
Note that you may have to adjust the Indentation → By property to a suitable value depending on your font.
5. Run through your checklist
Now all you have to do is ask your teammates to run through the checklist by clicking on the checkbox.
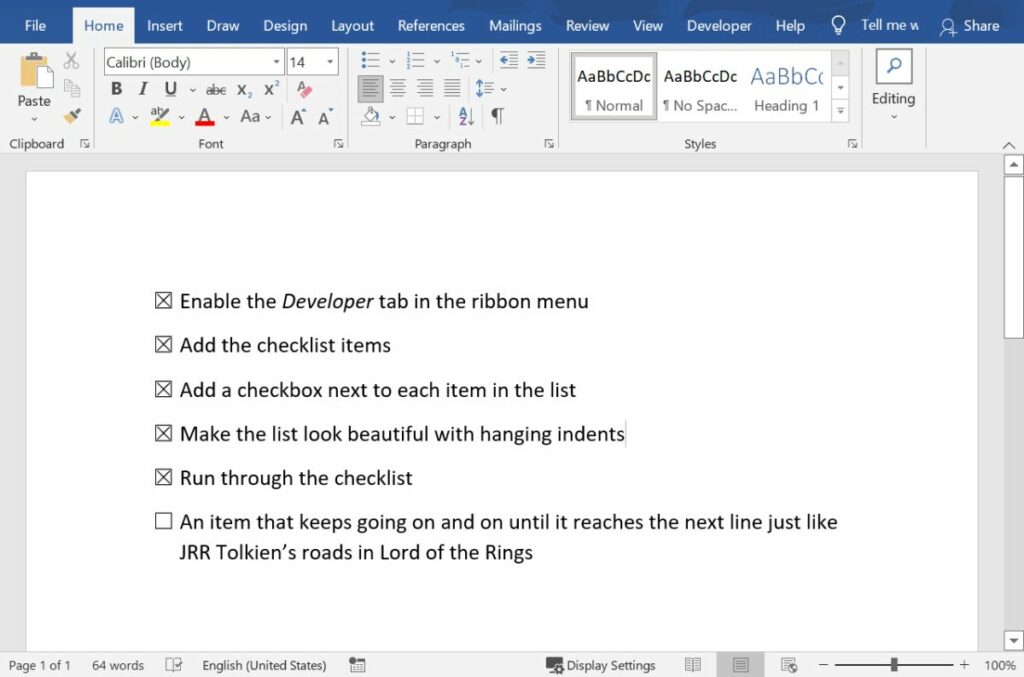
You can also change the checkboxes from an X to a checkmark or other characters from the Developer → Properties menu.
How to make a checklist in Word on Mac devices?
You can follow the exact same steps outlined above on Mac devices as well. The only difference is how you enable the Developer tab in the ribbon menu.
To enable the Word Developer tab on Mac devices:
- Open the Ribbon and Toolbar Options dialog by navigating to Word → Preferences → Ribbon and Toolbar.
- Check the Developer checkbox in the Main Tabs control.
How to make a print-only checklist in MS Word?
If you’re using Microsoft Word 2007 or before, you can only create a printable checklist. Print-only checklists are great for simple personal to-do lists where you don’t have to collaborate with others.
Let’s look at the steps to create one:
1. Write down your checklist items
Start with your list. Type the list of your to-do items in the Word document.
2. Turn the checklist into an unordered list
Next, turn your items into an unordered list.
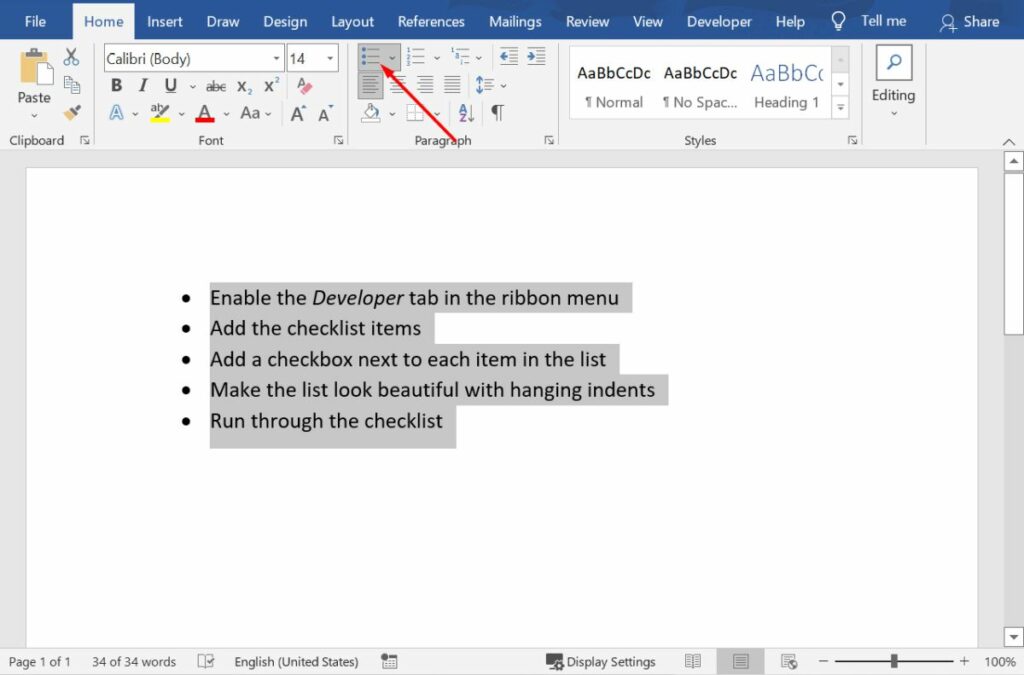
To create an unordered list of your checklist items:
- Select all items.
- Click on the Home → Bullets button in the Home tab of your ribbon menu.
3. Format the bullets to look like checkboxes
Finally, we need to make the bullet list look like a checklist.
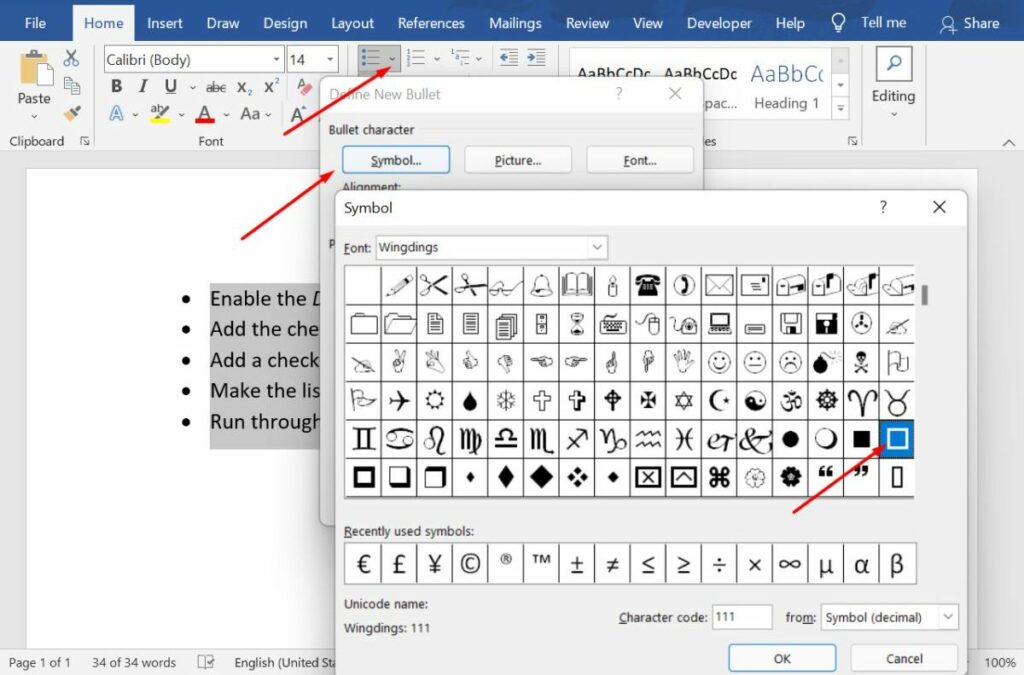
To change the bullets into boxes:
- Click on the dropdown arrow next to the Home → Bullets button.
- Select Define New Bullet.
- Select Symbol and find a box character. If the box character isn’t available with your font, select the Wingdings font.
- Click Ok twice to see your checklist.
The only way to run this checklist is to print it out and check off items with a pen or a pencil.
Pros and cons of Word checklists
Perhaps, by now, you have already realized that MS Word checklists come with their own advantages and limitations. Here’s a quick summary:
Advantages of Word checklists
- Easy to create
- Easily accessible as every office has access to Microsoft Word
Disadvantages
- Not shareable — particularly if you’re working from home
- Difficult to collaborate and check who’s checking off what, in case of a big team
To get around this at work, consider using Toggl Focus. It’s a beautifully simple capacity management tool that helps you and your team deliver work on time without the last-minute rush.
With Toggl Focus you can plan your tasks on a timeline or use a simple task board. You can attach files, add comments, and other details right on the task itself. Plus you can attach a checklist to each task to improve task completion quality.

Elizabeth is an experienced entrepreneur, writer, and content marketer. She has nine years of experience helping grow businesses, including two of her own, and shares Toggl's mission of challenging traditional beliefs about what building a successful business looks like.

