Are you tired of your team’s inconsistent (and sometimes incomplete) output?
Imagine having a simple tool to help you create checklists to ensure every task is completed efficiently and on time. With Google Docs, you can easily create and share checklists to streamline your workflow and enhance team productivity.
In this article, you will learn:
- The advantages of using Google Docs for checklists
- How to create and customize your checklist
- Tips for optimizing and running your checklist efficiently
You’ll also get access to a free Google checklist template that we use in the marketing team at Toggl.
Ready to uplevel your team’s delivery efficiency? Let’s dive in and get started!
Note: We have detailed intrusctions on building checklists in Excel if you prefer using that. You can also learn how to build checklists in Word.
Why use Google Docs for checklists?
Google Docs is a great tool for creating and managing checklists. It’s easy to use and helps your team stay organized and on track.
Here’s how:
Benefits of Google Docs checklists
- Always accessible: Google Docs checklists can be accessed from any device with an internet connection, making it easy for your team to access no matter where they are.
- Improves teamwork: Team members can view and edit the checklist simultaneously, making collaboration easy.
- Easy and flexible: Google Docs is mostly available to everyone, is simple to use, and doesn’t need much training. You can format your checklists any way you like.
How does Google Docs compare to other checklist tools?
Unlike other apps, Google Docs doesn’t require extra software or subscriptions, making it affordable. It also works well with other Google Workspace tools.
And compared to making a checklist in Excel or Google Sheets, it’s easy to format and print checklists in Google Docs.
Using Google Docs helps your team get started using checklists easily and free of charge.
In the next section, we’ll show you the step-by-step process for creating a checklist in Google Docs.
How to create a clickable checklist in Google Docs
Checklists are simple yet powerful employee productivity tools. A checklist made using Google Docs lives online, which makes it easy to share and collaborate.
When working with a team, you want them to check off their list of items in the document. That’s where a clickable (or checkable) checklist helps.
Let’s look at the steps to create one:
1. Enter your to-do items on a Google Document
You can’t have a checklist without a list of things to do.
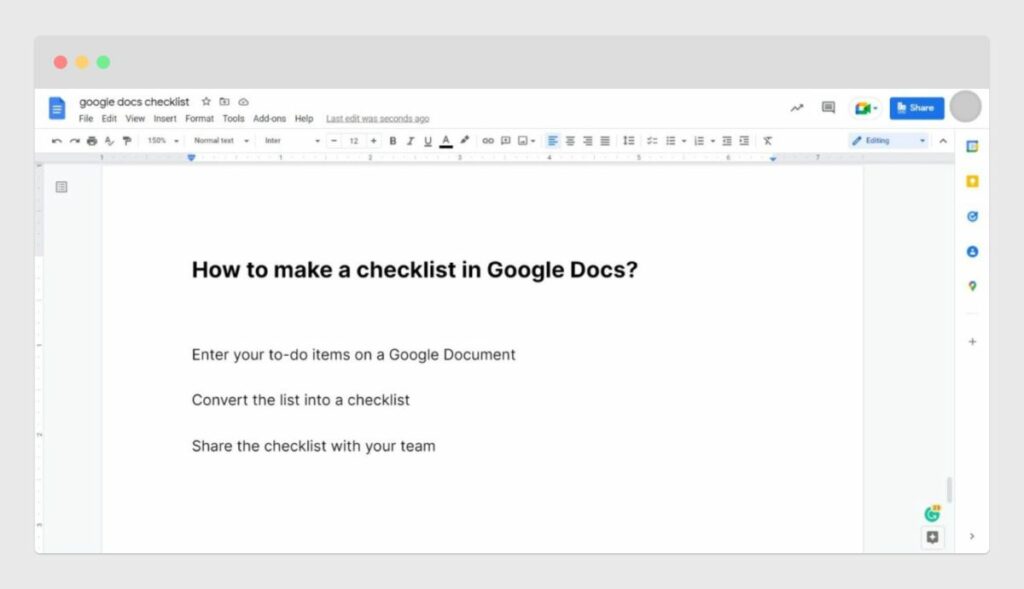
So, the first thing you need to do is add your to-do items to your Google Document. Simply add one item per line, hitting the enter key as you finish each item.
2. Convert the list into a checklist
Next, we need to add a checkbox for your team to check off before each item.
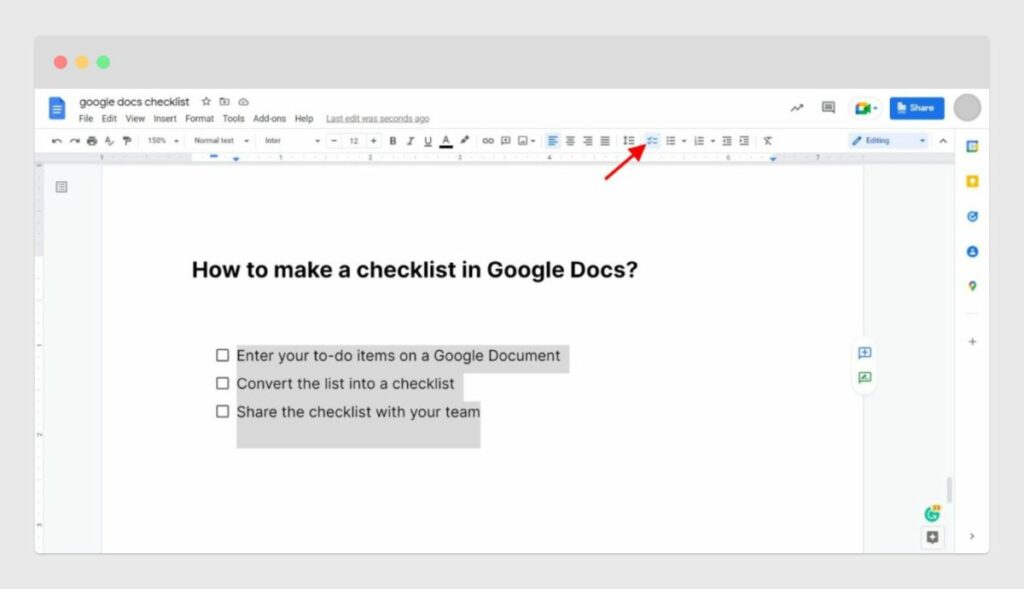
Here are the steps:
- Select all the items in your list.
- Click on the Checklist button in the Google Docs toolbar.
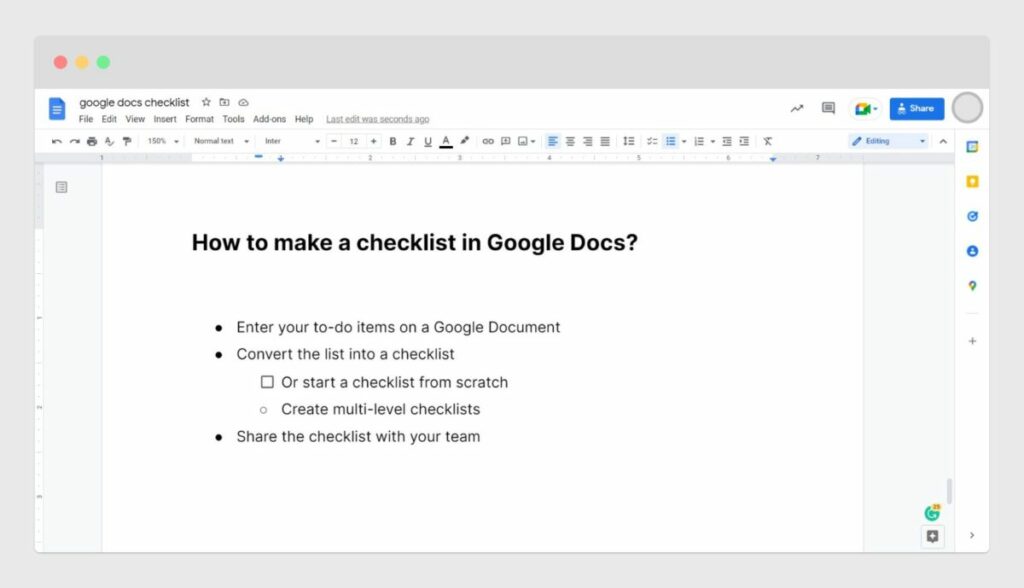
Starting with a blank checklist
Instead of converting a list of items into a checklist, you can start with a blank list by clicking the Checklist button in the menu. This adds a checkbox to the document.
Enter your first item next to this checkbox and hit enter or return. This will automatically add another item to your list, such as the number or bullet list.
Multi-level checklists
Creating a multi-level checklist in Google Docs is easy too.
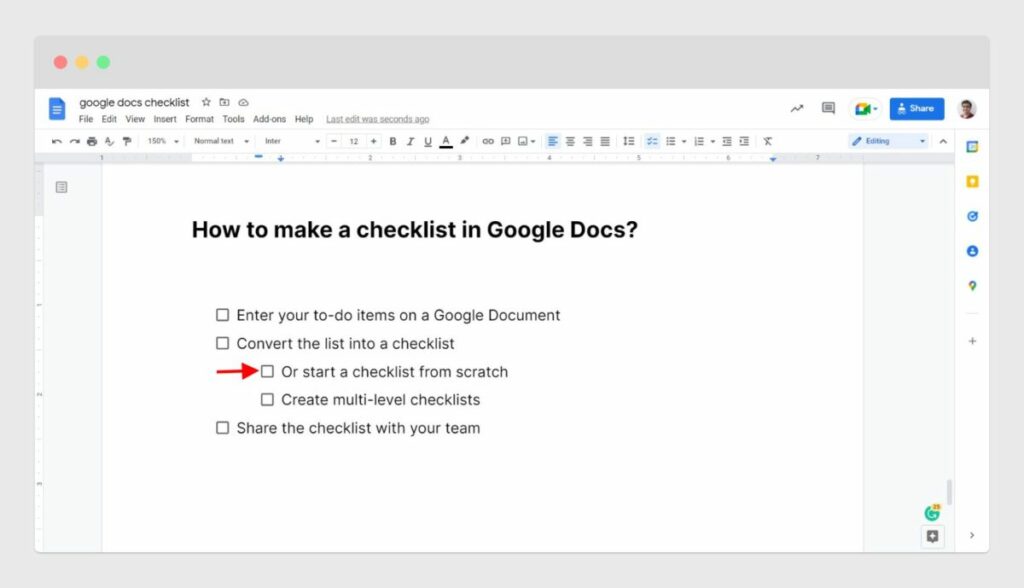
To do so, move your cursor to the start of a list item and hit the tab key or press the Increase indent button on the toolbar.
3. Share the checklist with your team
Finally, you can share this checklist with your colleagues and ask them to check off their to-do items.
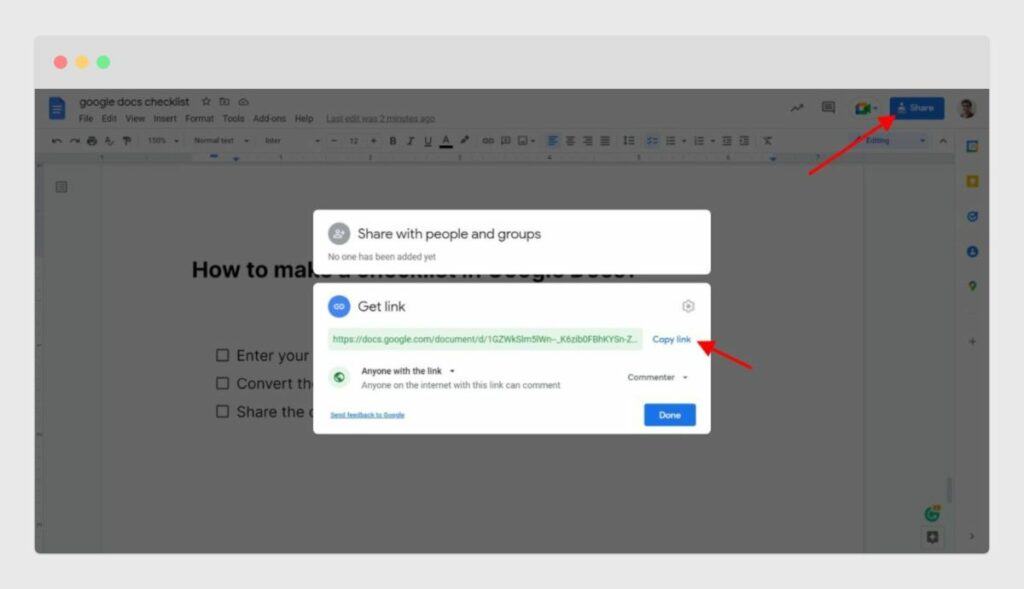
To share the document:
- You can open the “Share with people and groups” dialog by clicking the blue “Share” button at the top-right corner of Google Docs or by clicking on the “File → Share” menu item.
- On this dialog, share the document with specific email addresses or create a “General access” link to share the doc with a group of people.
- Ensure that “Editor” access is set when sharing the checklist.
Once shared, your team members can simply click on a checkbox to remove the task from the list.
Making reusable checklists in Google Docs
To make the above checklist reusable:
- In the “General access” section of the “Share” dialog, give “Viewer” access to the people and groups who can access the checklist.
- Instruct them to make a copy of the checklist from the “File → Make a copy” menu item.
How to make a checklist from a bulleted list
Sometimes, you already have a list of items in bullet form. You can easily turn it into a checklist.
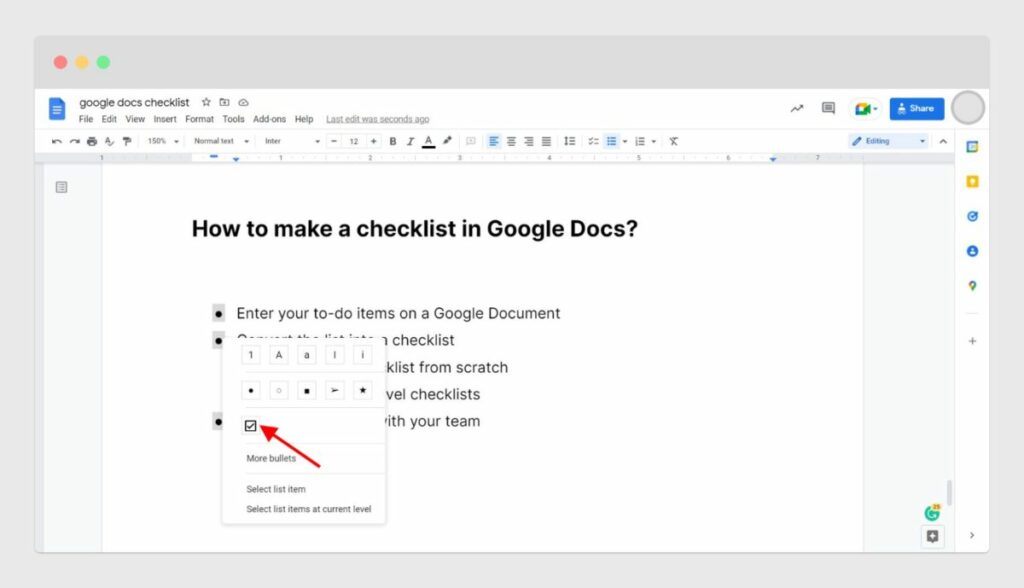
Here’s how you can do that:
- Click on a bullet next to your bulleted list item. This selects all the bullets in your list.
- Right-click on the bullet to open a popup menu.
- Finally, click on the checkbox button in the popup menu. And your list turns into a checklist.
You can also turn a single list item into a checkbox. Follow the same steps above, but remember to double-click on the target bullet list item.
Grab our free Google Docs checklist template
To make things even easier, we’ve created a free checklist template. This template can save you time and help you get started quickly.
- Click here to make a copy of our checklist template.
- Edit the checklist heading, sub-headings, and items to match your workflow.
- Share the checklist with your team using the steps outlined above.
You can find some more personal and professional checklist templates here, including those for travel, cleaning, self-care, new-hire onboarding, etc.
Next, we’ll discuss some tips for optimizing your checklists.
Tips for optimizing your checklist
Once you set up your checklist, you can optimize it to make it even more effective. Here are some tips to help you get the most out of your checklist:
Organize with headings and sections
- Create sections: Use headings to divide your checklist into different sections. This helps to group related checklist items.
- Use subheadings: For larger projects, use subheadings to break down tasks into smaller, manageable parts.
Add links and attachments
- Link to resources: Add hyperlinks to relevant documents, websites, or resources your team may need.
- Attach files: Use the Google Docs “Smart Chips” feature to attach files directly to your checklist items for easy access.
Collaborate in real-time
- Use “Smart Chips”: Insert people, voting options, and calendar events to improve collaboration.
- Enable comments: Allow team members to leave comments on checklists and items. This can be useful for asking questions or receiving feedback.
How to run a checklist in Google Docs
Running a checklist involves going through each checklist item from top to bottom and checking them off as you complete them. This ensures all items are completed.
Here are the steps to run checklists and keep them up to date.
Running checklists
- Go through each checklist section, top to bottom, item by item.
- As you complete an item, check it off. This visually indicates progress by striking the checklist item off your list.
Keeping checklists up to date
- Edit sections and items as needed: Keep your checklist up to date by adding, removing, or modifying tasks as the project progresses.
- Prioritize checklist items: Reorder items based on priority to ensure the most important items are completed first. This is crucial to maximize your personal productivity or achieve optimal team time management.

By actively managing and updating your checklist, you can ensure that all tasks are completed efficiently and on time.
In the next section, we’ll discuss improving your checklist workflow using time tracking software.
How to improve your checklist workflow
Improving your checklist workflow can help you identify bottlenecks and make your team more efficient. Here’s how to use time tracking to enhance your checklist process:
Identify bottlenecks with time tracking
- Choose a time tracking tool: Select a time tracking software that integrates with Google Docs or your overall workflow, such as Toggl Track.
- Track completion times: Have team members log the time it takes to complete each item on the checklist. This data will help you identify which tasks take longer than expected.
Toggl Track’s Chrome extension makes it easy to track time spent on a checklist item using a simple start/stop timer. To use it:
- Sign up for a free Toggl Track account.
- Install the Chrome extension.
- Track time spent on each item in your Google Docs checklist.
Analyze data to find inefficiencies
- Review tracked time: Look at the tracked time data to identify checklist items that consistently take longer.
- Spot patterns: Notice any recurring delays or bottlenecks in the workflow. These patterns can highlight areas that need improvement.
Update your checklist to improve workflow
- Re-assign checklist items: Reassign items to team members who may be able to complete them more efficiently based on their skills and strengths.
- Streamline steps: Simplify or automate processes that take too long. For example, use templates or standardized operating procedures to speed up repetitive tasks.
- Provide training: Offer additional training or resources to team members struggling with specific items to improve efficiency.
Ready to get started with checklists?
Creating and managing checklists in Google Docs can transform your team’s productivity and ensure consistent, high-quality output. Throughout this article, you have learned:
- The benefits of using Google Docs for checklists
- How to create and customize a checklist
- Tips for optimizing and running your checklist efficiently
By leveraging these tips and tools, you can streamline your workflow and keep your team on track. Next, consider exploring more advanced features in Google Workspace or other productivity trackers to enhance your project management capabilities.

Elizabeth is an experienced entrepreneur, writer, and content marketer. She has nine years of experience helping grow businesses, including two of her own, and shares Toggl's mission of challenging traditional beliefs about what building a successful business looks like.


![How To Improve Employee Productivity – 10 Tested Ways [2024]](https://toggl.com/blog/wp-content/uploads/2024/02/employee-productivity-673x404.jpg)